 CareCard
CareCard GuideVerification
Recording a Decision
Approve a requirement, set another status with a comment, or change a decision you already made.
When a requirement is waiting on you, two buttons sit at the bottom of the document panel: Approve and Set Status. Nothing is saved until you type the confirmation word.

You only see the buttons when:
- You are signed-in CareCard staff.
- The requirement is Submitted or On Hold.
- No one has decided it yet.
Approve
Click Approve. Then:
- Pick an expiry date, or tick Never expires.
- Type
approveto confirm.
An approval needs no comment. The expiry you set decides how long it lasts.
Set Status
Use Set Status for any other answer.
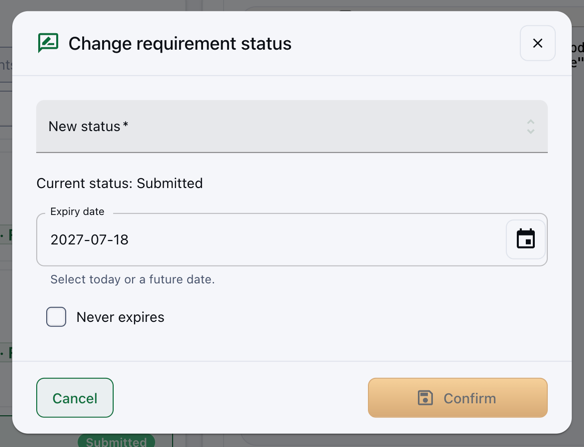
Fill in:
- New status — Pick the status to record. The list holds every status except the current one. On a first decision, Approved is not here — use the Approve button for that.
- Expiry — Same as Approve. Conditional always needs a date, so Never expires is turned off for it.
- Message / reason — Required. This is all the student sees, so be clear. Say "the certificate has no issue date", not "insufficient".
- Type
confirmto save.
What each status means:
- Processing — You are still working on the review.
- On Hold — Paused for a reason outside the document. This blocks the certificate.
- Information Required — Something is missing or can't be read.
- Not Submitted — Send it back to the student as not yet sent.
- Rejected — The document does not meet the requirement.
- Conditional — Accepted, but only until a set date.
- Cancelled — No longer needed.
Changing a Decision
A decision is not final. Click the status badge at the top of the panel to open the same dialog again and pick a new status — this time Approved is in the list too.
Did It Save?
- "Verification decision saved." — Done. The panel shows the new status, your name, and the date.
- "Unable to save the verification decision." — Something changed while you were deciding (another reviewer, or a new upload). Reload the review and decide again.