 CareCard
Pre-Approving Students
Pre-approve expected students, interns, or volunteers so their institution access requests clear automatically.
If you already know who will join your program, pre-approve them. Their request then clears automatically and skips your review queue.
Only Program Coordinators manage Pre-Approvals — Institution and Campus Admins don't have this page. Open it from More in the side menu.
How Pre-Approval Works
A Pre-Approval doesn't admit anyone by itself. It waits for a matching request:
- You add a Pre-Approval — Create it manually, or upload a CSV.
- It waits at Not Approved — Until a matching request arrives.
- The person requests access — With the same email.
- Their request clears automatically — It never reaches your Requests queue.
Everyone not on your list still goes through the normal approve or reject.
The Pre-Approval Page
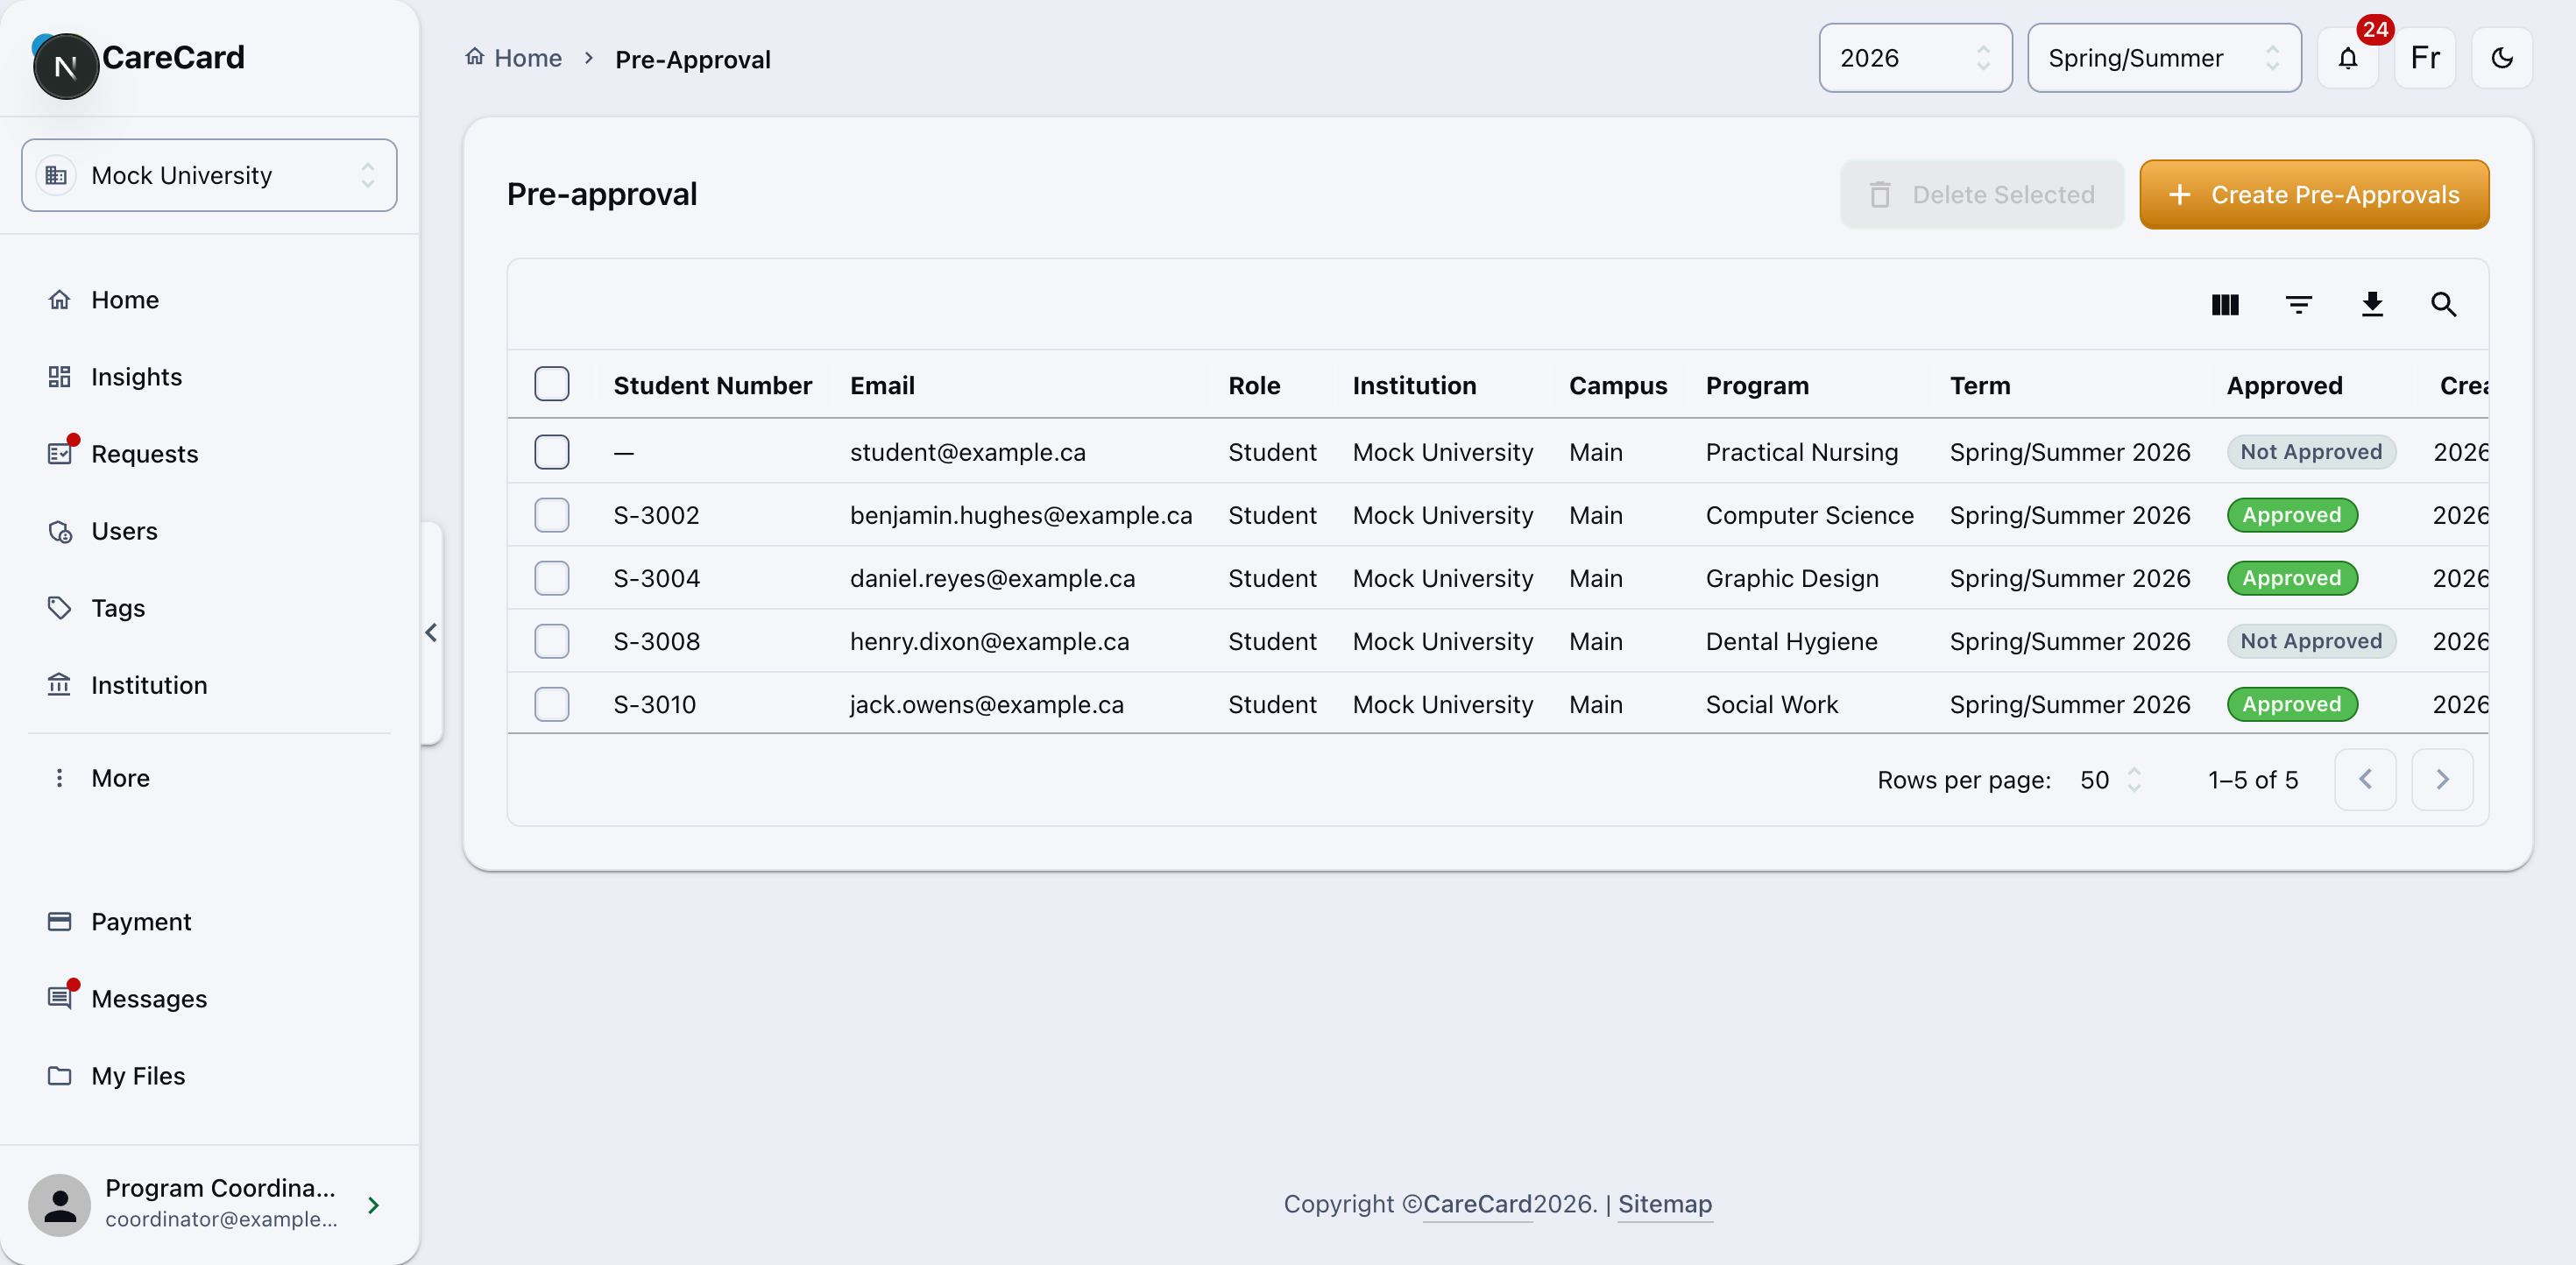
Each row is one pre-approved person, with an Approved or Not Approved status:
- Approved — The person requested access and cleared automatically.
- Not Approved — No matching request has arrived yet.
Adding Pre-Approvals
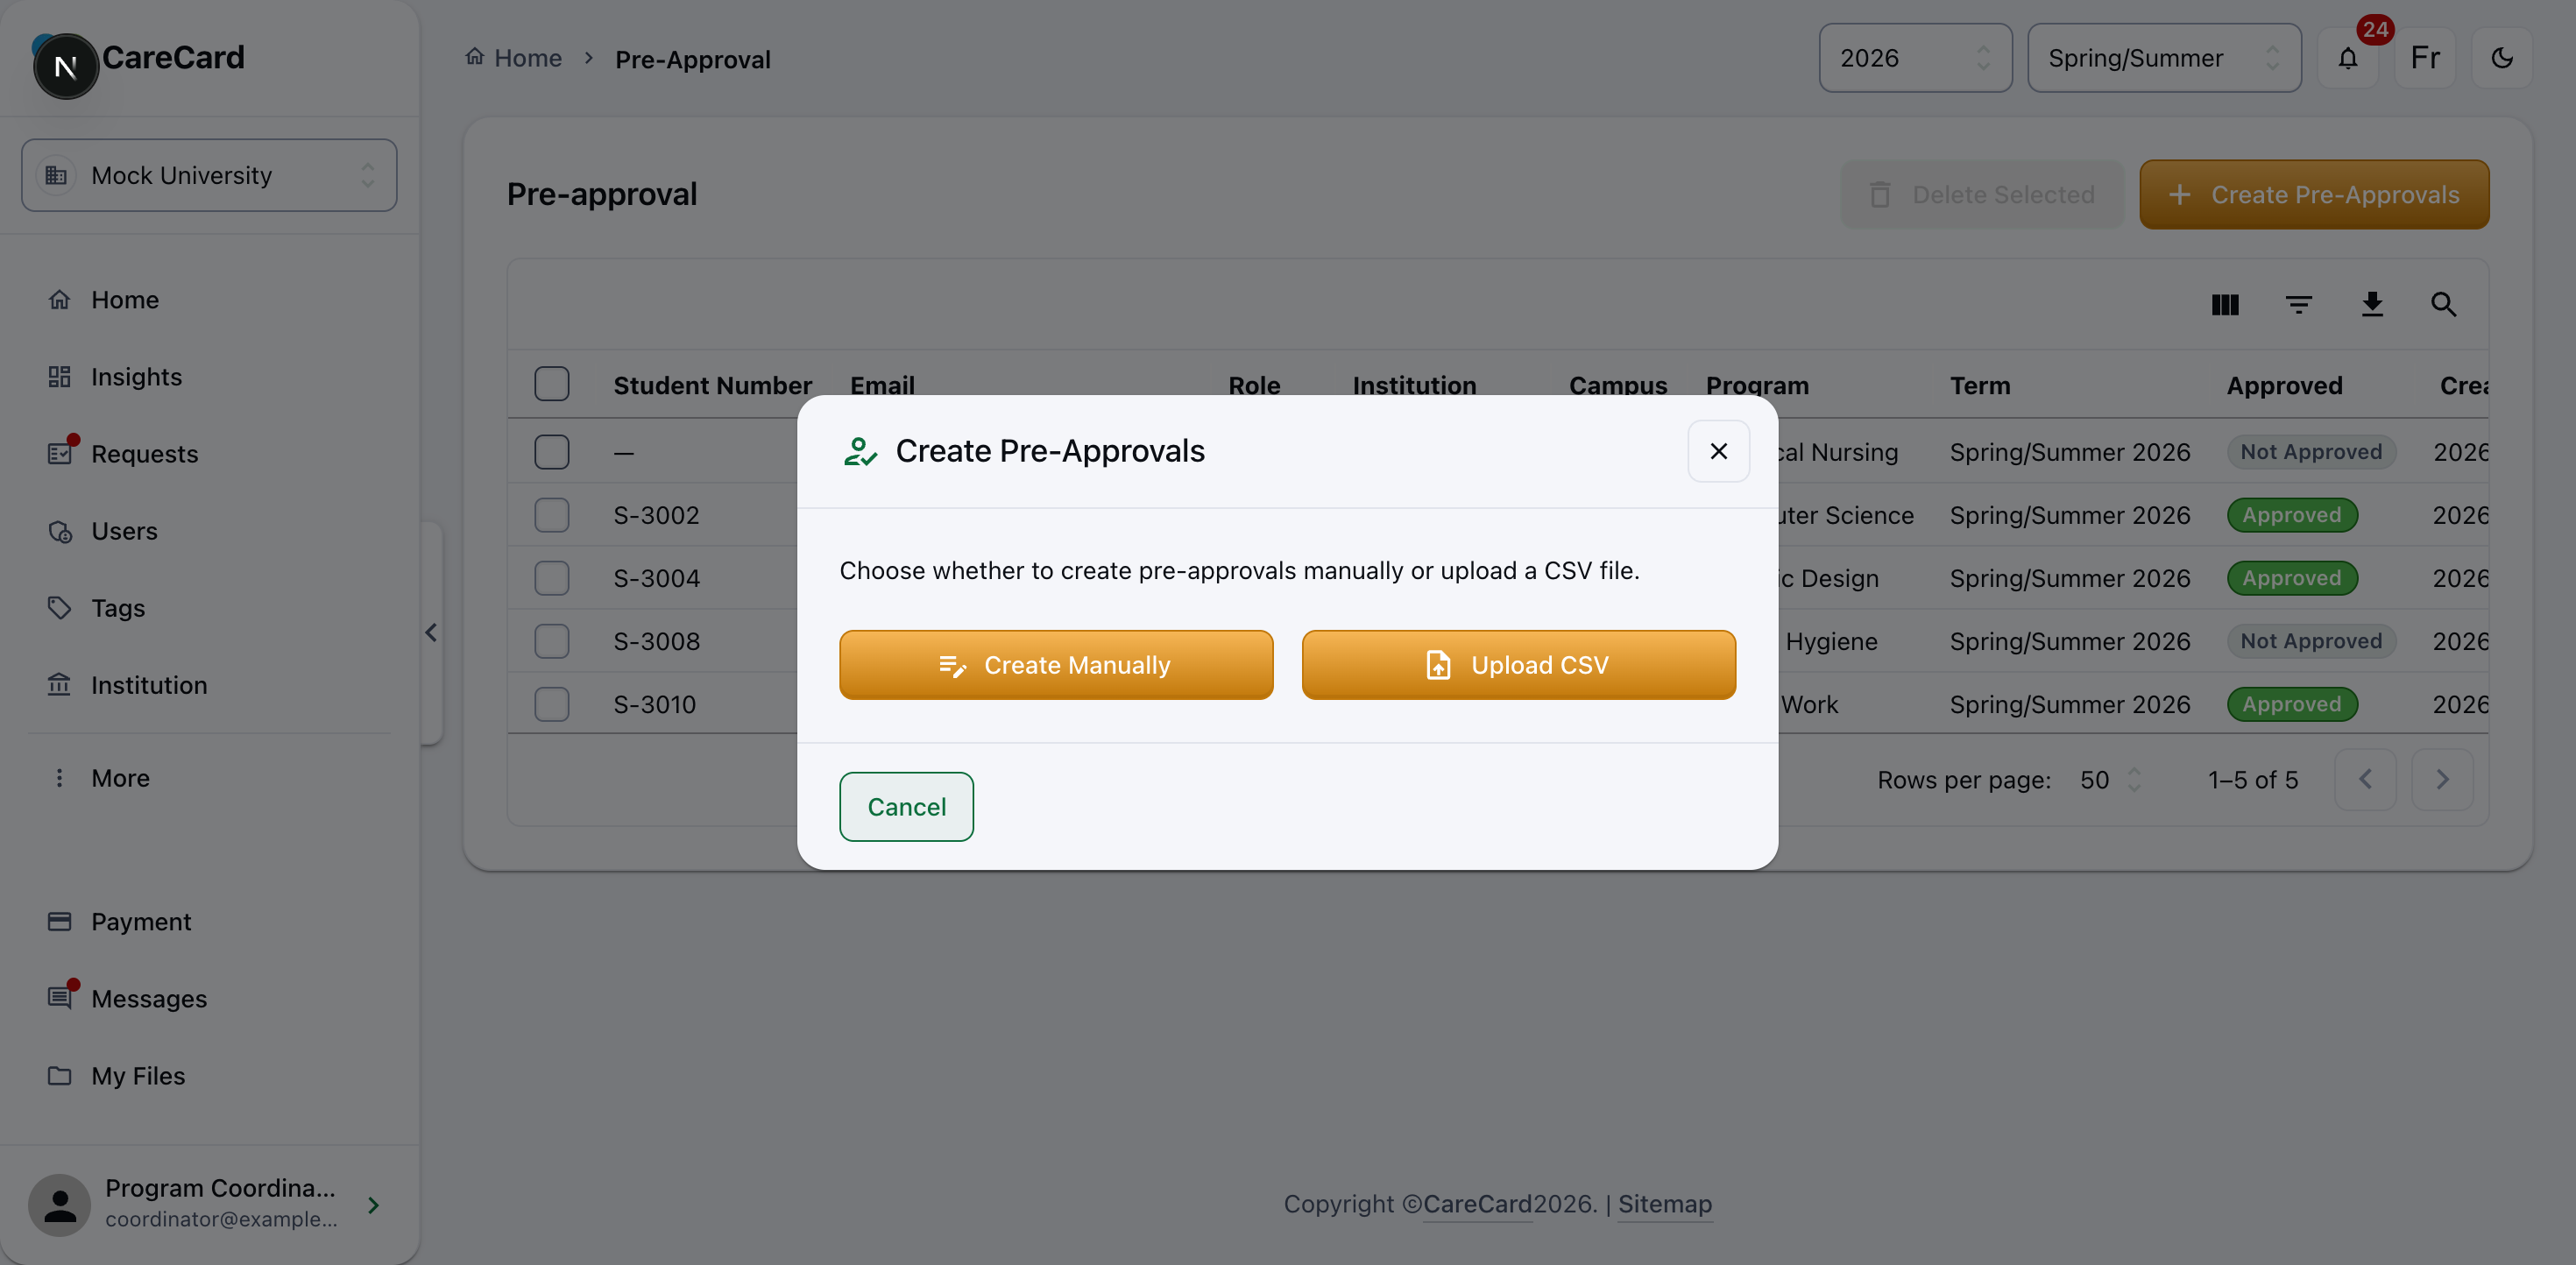
Select Create Pre-Approvals, then choose Create Manually or Upload CSV.
Create Manually
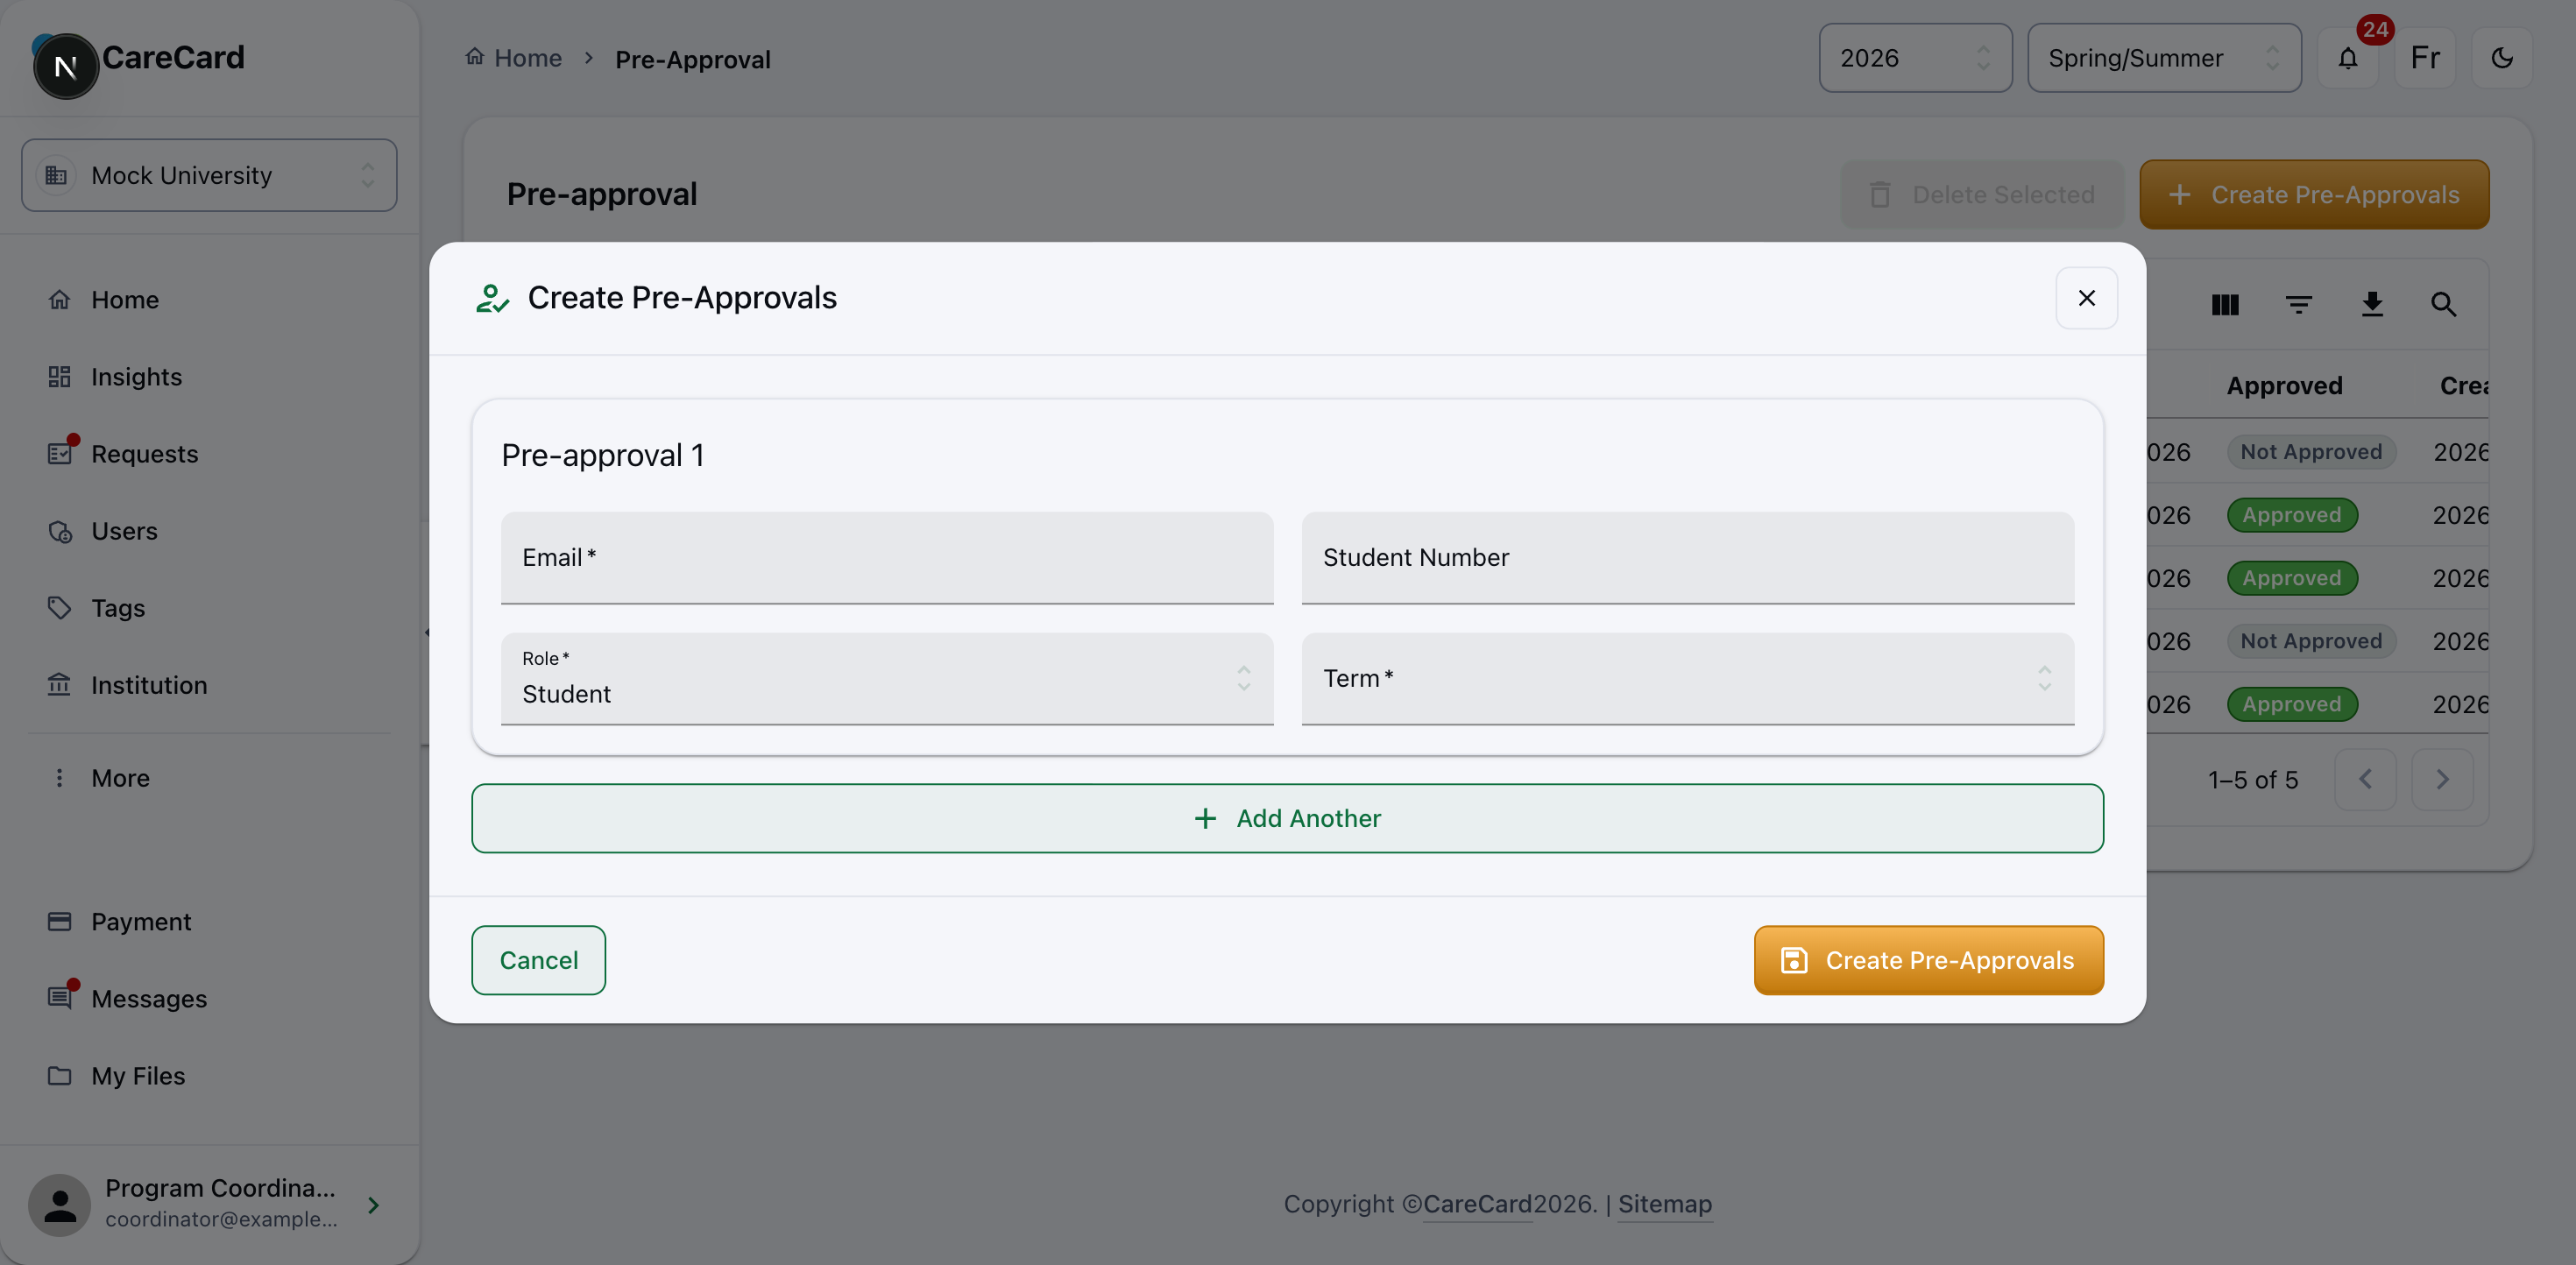
Fill a row for each person (Email required), add more with Add Another, then select Create Pre-Approvals.
Upload CSV
Add many people at once with a CSV file. CSV is the only accepted file type.
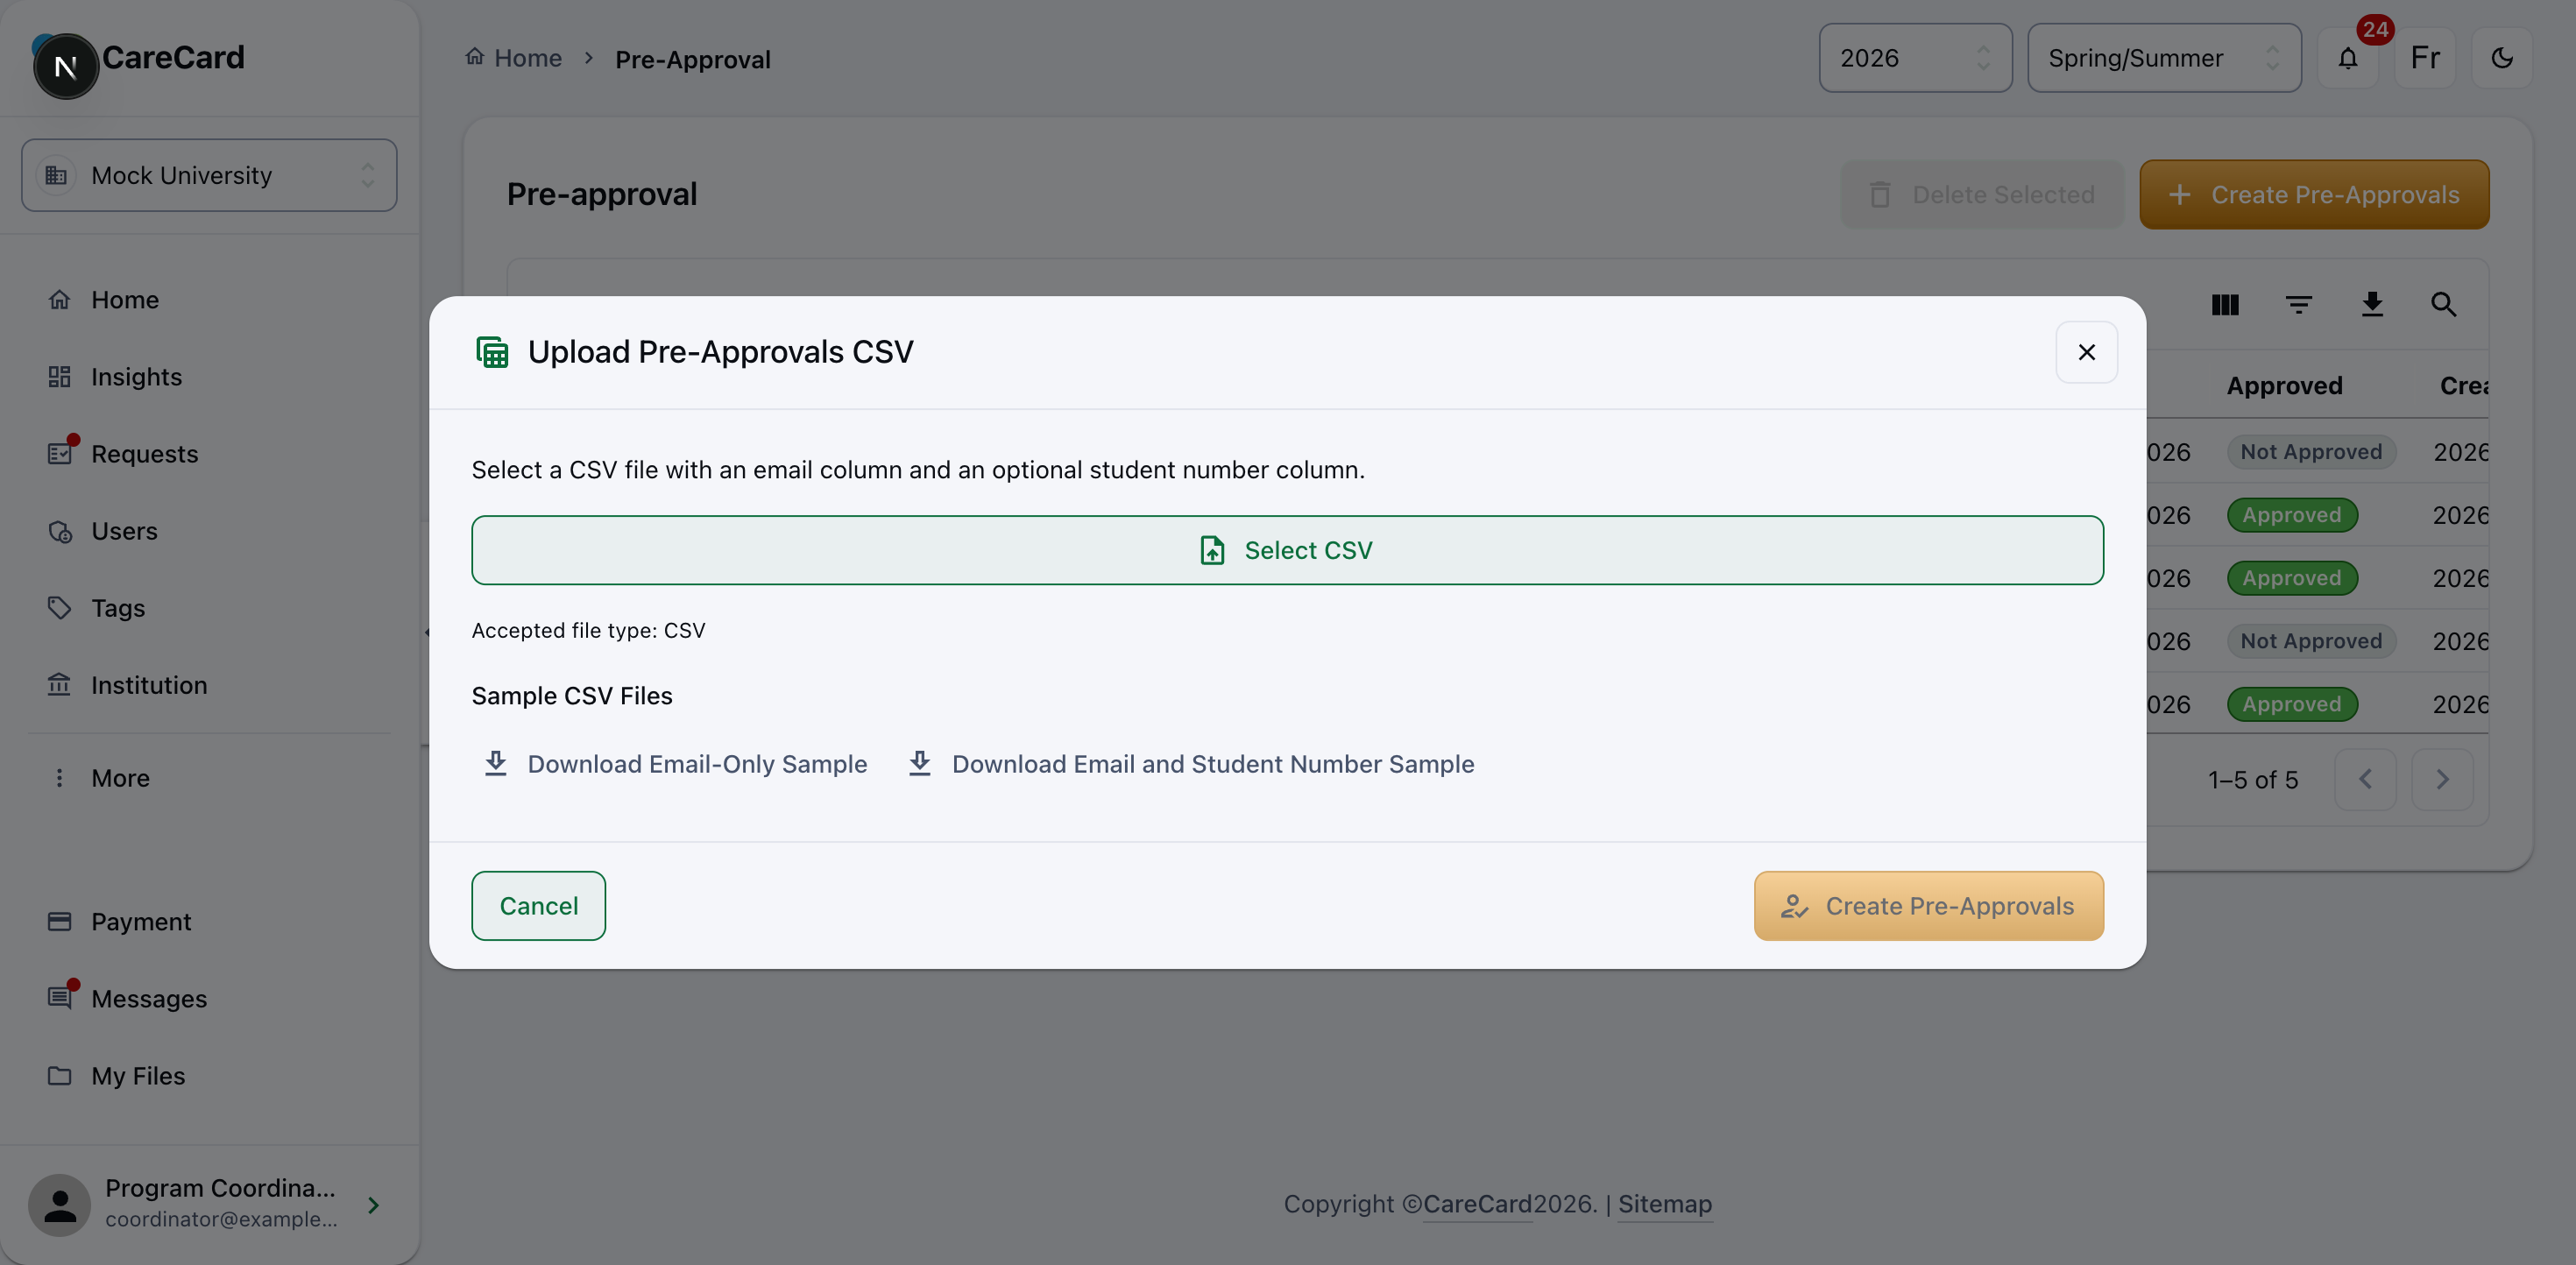
- Download a sample (email only, or email + student number) so your columns match.
- Select CSV, then set one Role and one Term — they apply to every row in the file.
- Select Create Pre-Approvals.
Removing Pre-Approvals
Select the rows you no longer need, choose Delete Selected, and confirm in the Delete Pre-approvals dialog.