 CareCard
Tags
Create tag categories and values, assign them to students on the Users page, and find tagged students by searching.
Tags let you record something CareCard doesn't already track — like a student's clinical rotation, semester, or level. You build tags on the Tags page, then assign them to students on the Users page.
The Tags Page
Tags opens the Tag Categories table. A category is the question (for example, level); its values are the answers (level-1 through level-8).
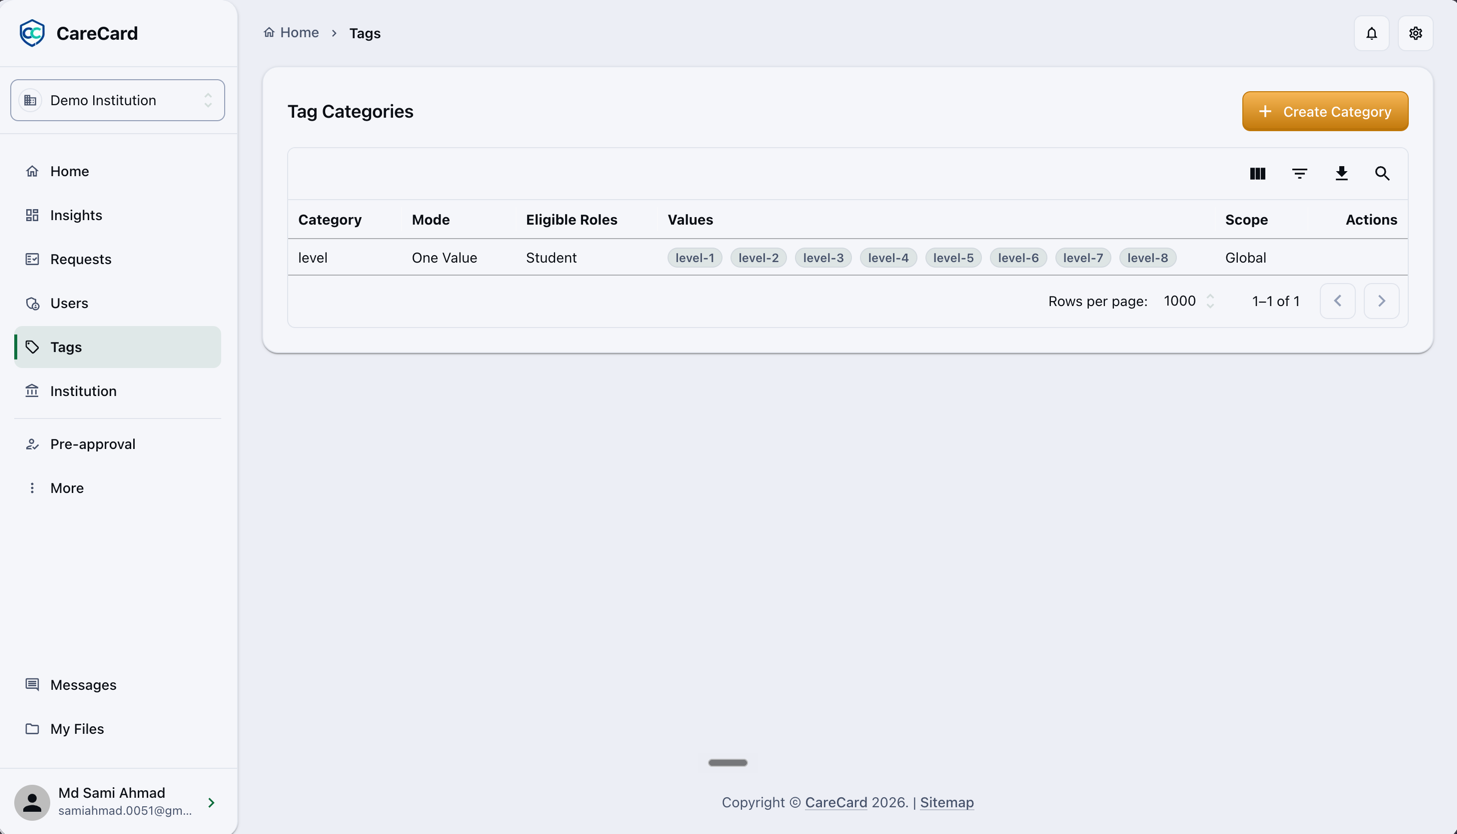
Creating a Category
Select Create Category, then fill in:
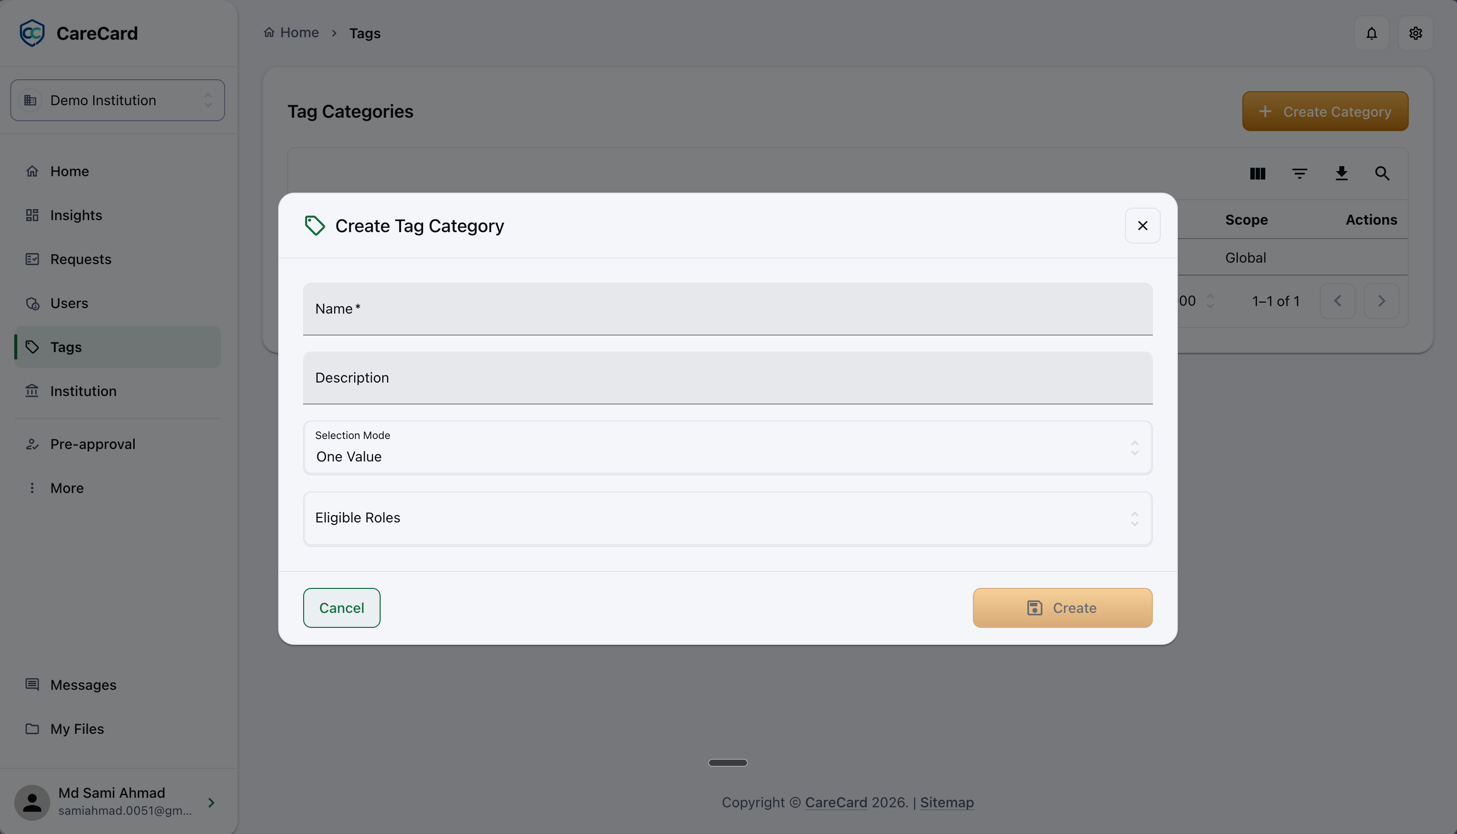
- Name — Required.
- Selection Mode — One Value (a student holds one) or Multiple Values (several at once).
- Eligible Roles — At least one role that can get the tag. Required; limit it to Student to keep the tag off staff records.
Add an optional Description, then select Create.
Selection Mode is a structural choice — set it before you assign the tag. Don't switch a category from Multiple Values to One Value once students already hold several.
A category's ⋯ menu offers Edit Category, Manage Values, and Archive Category.
Managing Values
Open Manage Values from the category's ⋯ menu. A new category reads No values yet.
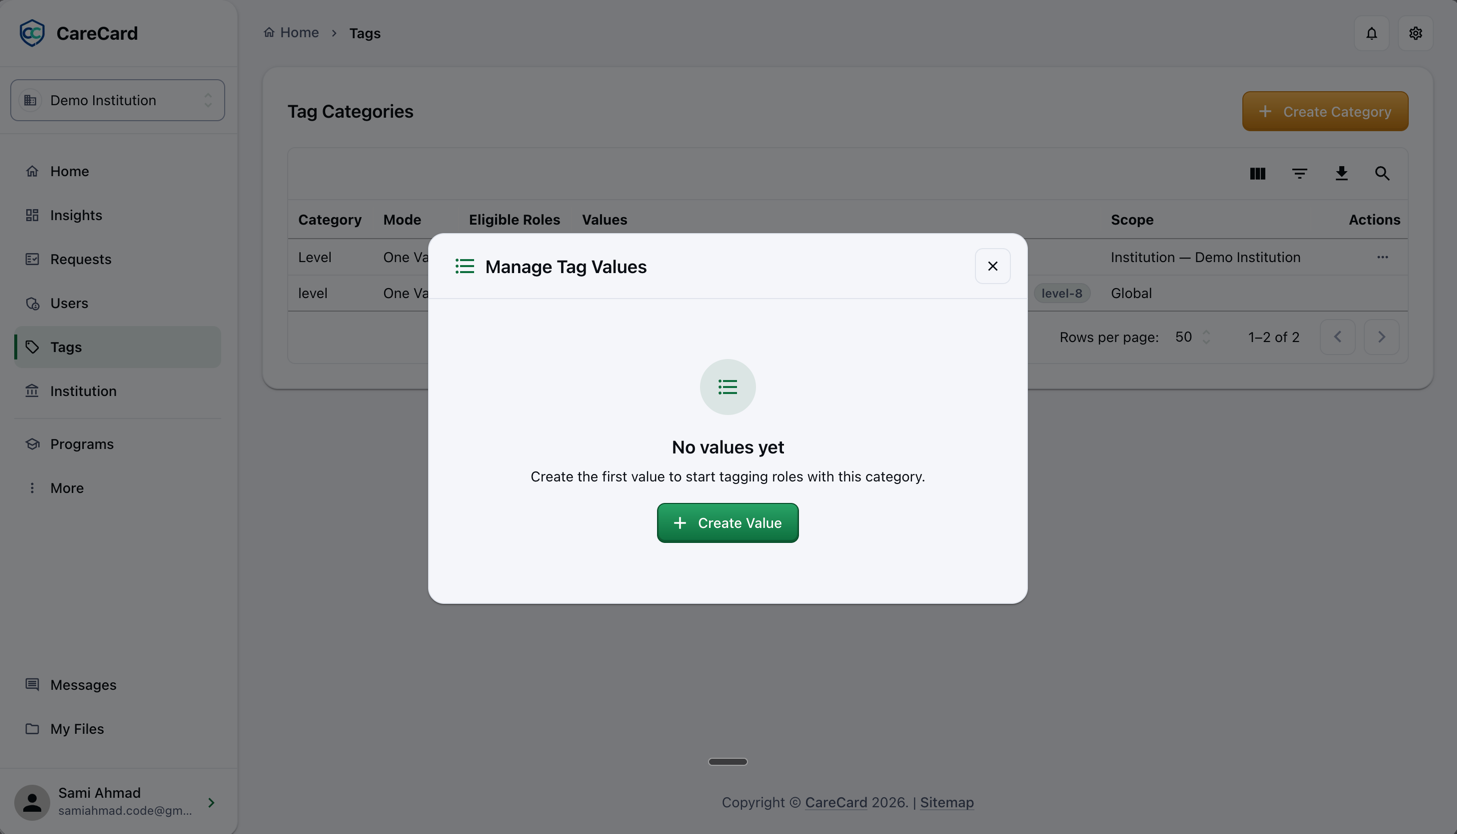
Select Create Value, then give it a Value (required), an optional Description, and a Display Order (lower numbers show first). Each value row has its own edit and archive icons.
Scope
A category's Scope sets how widely it's used — Global (all of CareCard), Institution, Campus, or Program (yours only). You don't pick it; it comes from where you create the category.
Archiving
Archive Category retires a whole category; a value's archive icon retires one value. You can't archive anything still assigned to someone — remove it from them first.
Assigning Tags on the Users Page
You assign tags on the Users page, not the Tags page.
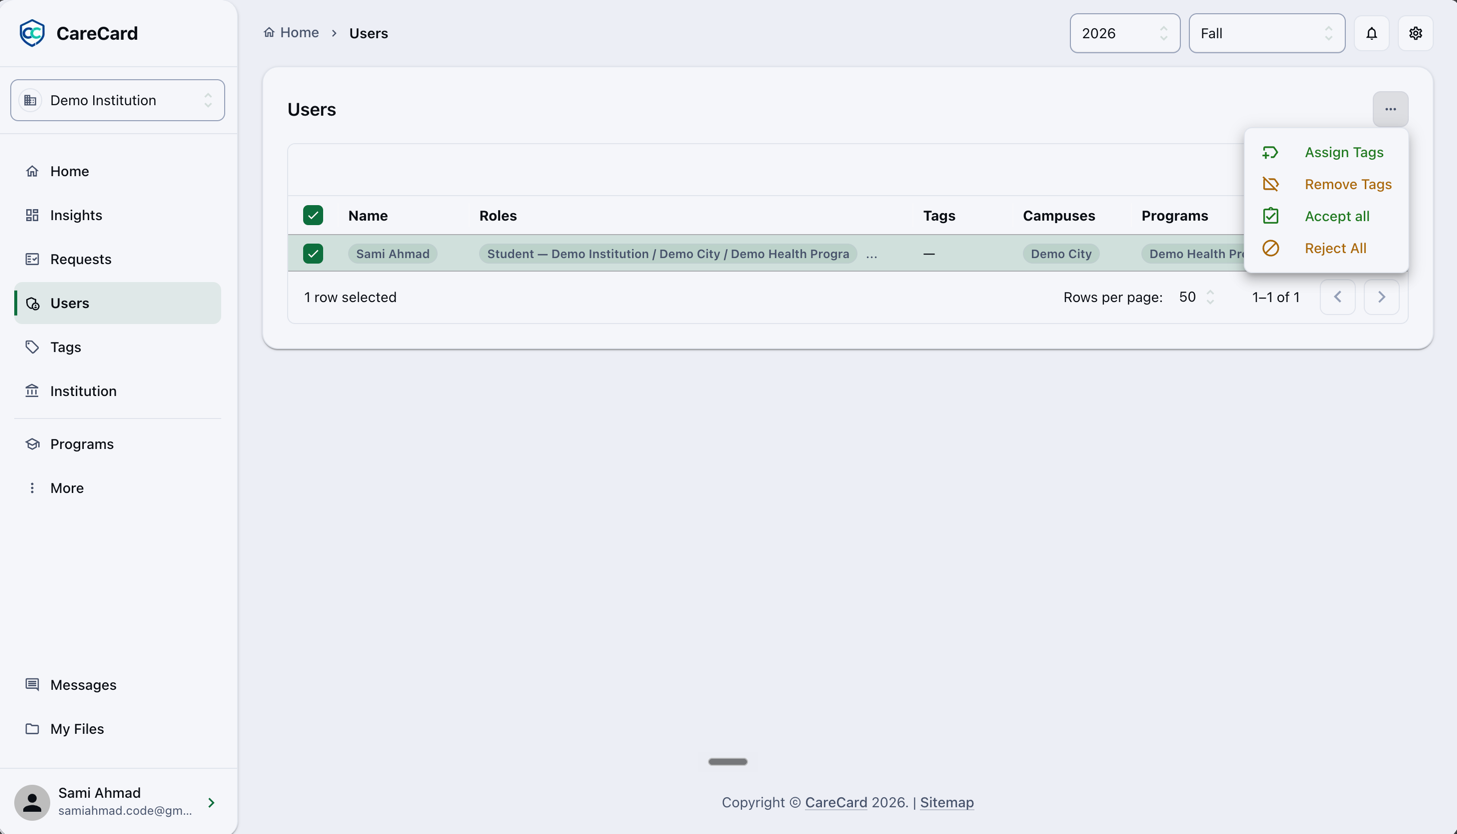
- On Users, select the students you want to tag.
- Open the Action menu and choose Assign Tags.
- In Assign Tag to Users, pick a value from the Tag Value list.
- Check the student roles that should receive it.
- Select Review, confirm, then Assign Tags.
To remove a tag, choose Remove Tags from the same Action menu and confirm.
Finding Tagged Students
A student's tags show in the Tags column on the Users page. The search box covers tag values, so type a tag to list everyone who has it — handy for gathering a rotation or semester before messaging them.