 CareCard
Uploading Requirement Documents
Upload a document for each requirement, submit it, track its status, and renew an approval.
The Requirements page lists the requirements assigned by your programs, plus any you add yourself. For each one you attach a file, submit it, and a reviewer decides.
The Requirements Page
Each row is one requirement. Its columns are Document Name, Requirement Types, Submitted Date, Expiry Date, Status, and Actions. The toolbar lets you choose columns, filter, export, and search. An empty list reads No requirements to show.
Select the at the start of a row to expand it into two cards:
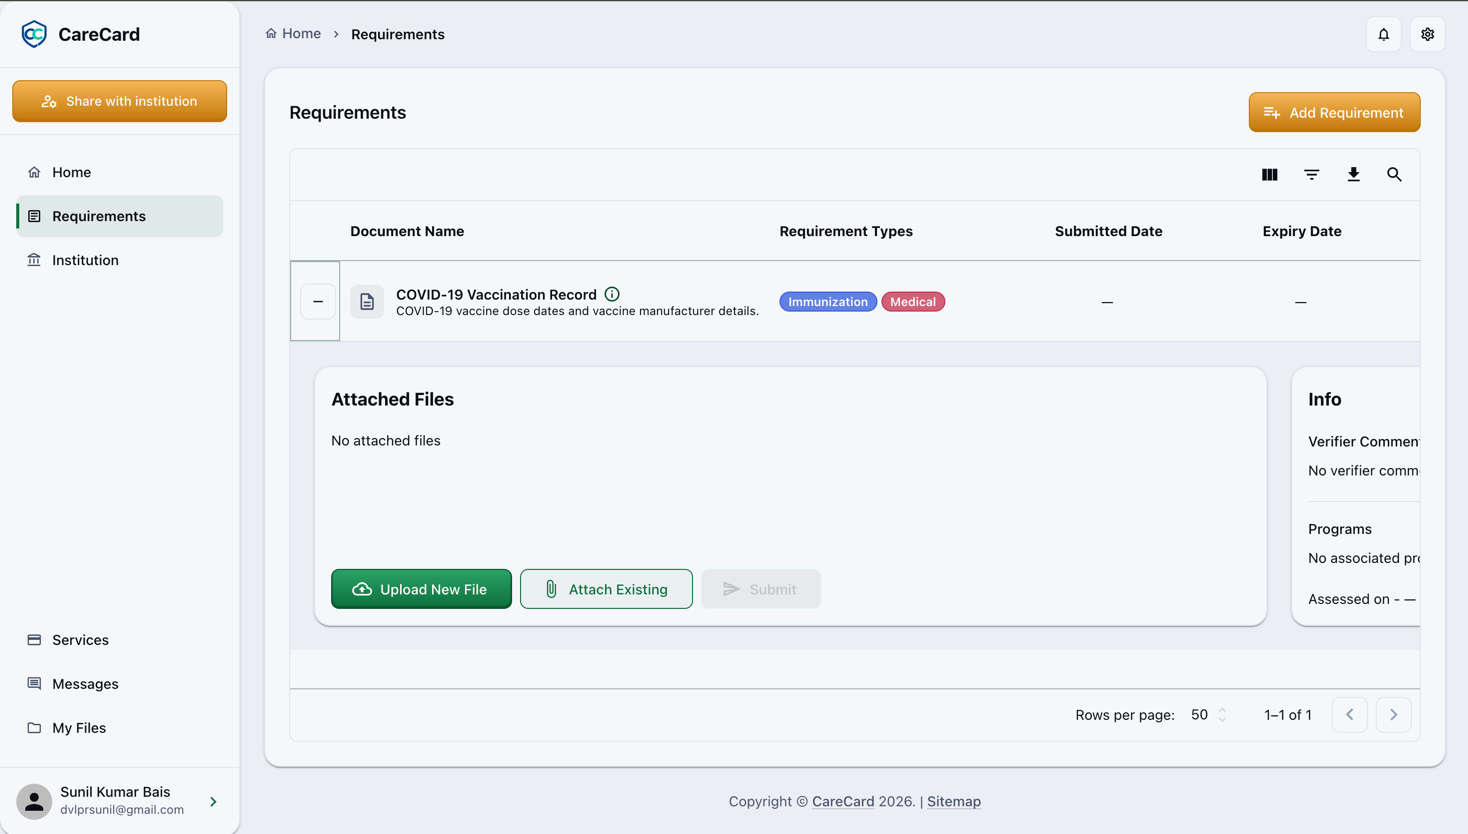
- Attached Files — Your attached files and the buttons Upload New File, Attach Existing, and Submit.
- Info — The Verifier Comment left for you, the Programs this requirement belongs to, and when it was last assessed.
The row's ⋯ menu holds the same actions, plus Detach File and Message (to reach a reviewer about that requirement).
Add a Requirement Yourself
Need one that isn't on your list? Select Add Requirement at the top of the page, pick one or more from the Requirements list, and select Add Selected Requirement.
Attach a Document
Open a requirement's Attached Files card and choose one:
- Upload New File — From your device. Select Select New File, then Upload File.
- Attach Existing — Reuse a file already in My Files.
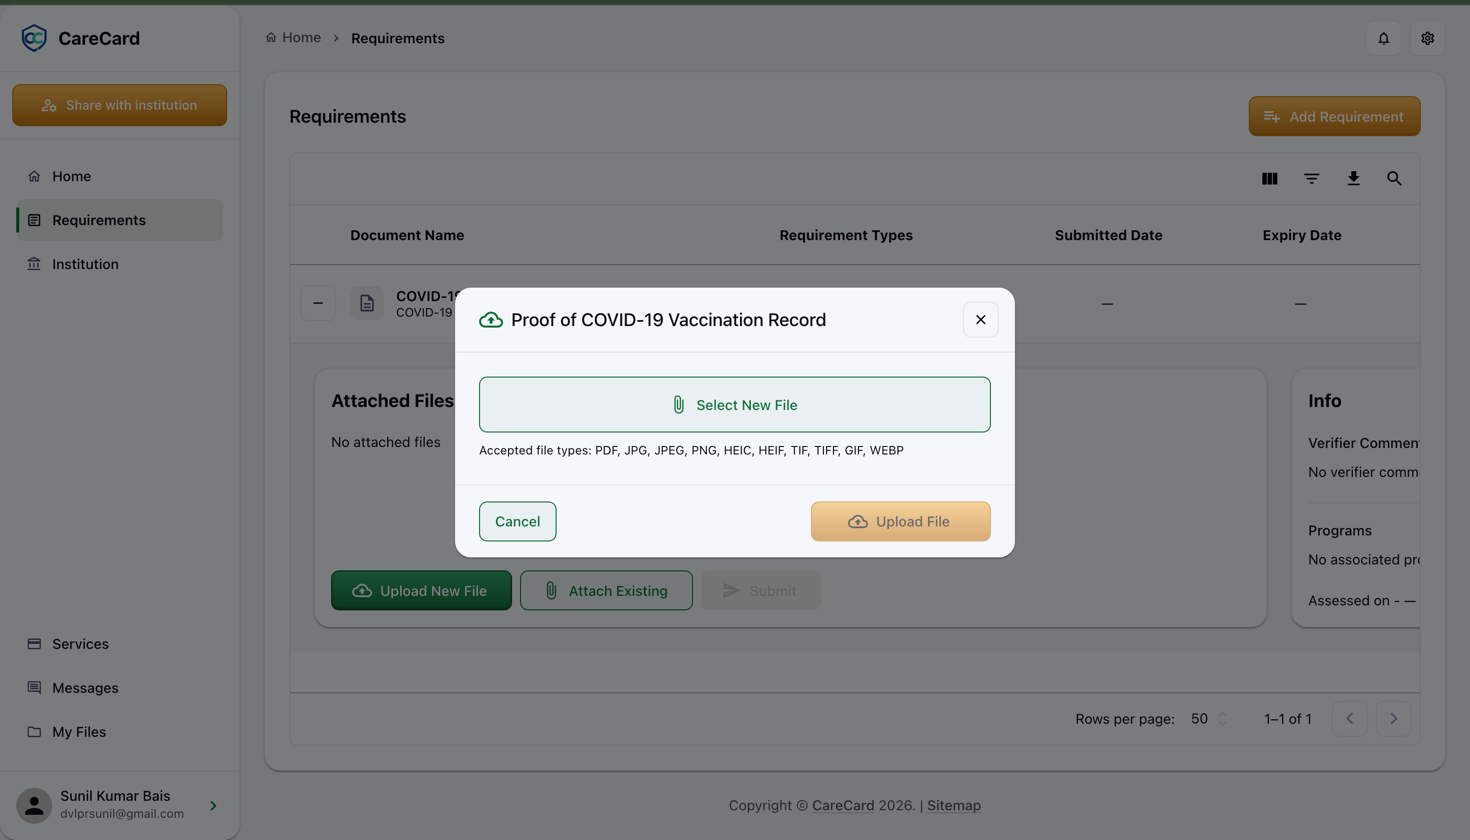
You can upload PDF, JPG, JPEG, PNG, HEIC, HEIF, TIF, TIFF, GIF, and WEBP files, up to 50 MB each.
Submit the Requirement
Once a requirement has an attached file, Submit appears. Confirm Submit requirement? to send it in — this locks the attached files and hands the requirement to the review team.
Wrong file? Select Cancel Submission from the ⋯ menu and type cancel. CareCard sets
the requirement to Cancelled and unlocks the file (unless another requirement still uses it).
Then attach the right file and submit again.
Track the Status
Each requirement shows one status:
| Status | What it means |
|---|---|
| Not Started | Assigned, with no file attached yet |
| Started | A file is attached but not submitted — select Submit to send it |
| Submitted | With the review team |
| Processing | The review team is working through it |
| On Hold | Paused — read the Verifier Comment for why |
| Information Required | A reviewer needs more from you — read the Verifier Comment |
| Approved | Accepted; it counts toward your certificate until it expires |
| Conditional Approval | Accepted with a condition; it still counts |
| Rejected | Not accepted — read the comment, attach a corrected file, and submit again |
| Expired | The approval passed its expiry date — renew it or submit new evidence |
| Cancelled | You cancelled the submission and the file unlocked |
Note
If a reviewer needs something, use the row's Message action to read or reply.
Renew an Approval
When an approval is eligible for renewal, its ⋯ menu offers Start Reassessment. Your current approval stays active while the new one is reviewed, and follows the same submit-and-track flow. Delete Reassessment cancels it and restores the previous approval. A requirement that never expires can't be reassessed.
When Your Certificate Is Ready
Once every assigned requirement has current evidence that is Approved or Conditional Approval and has not expired, open Your Certificate to view and share it.